


T12 ID EM electronic lock


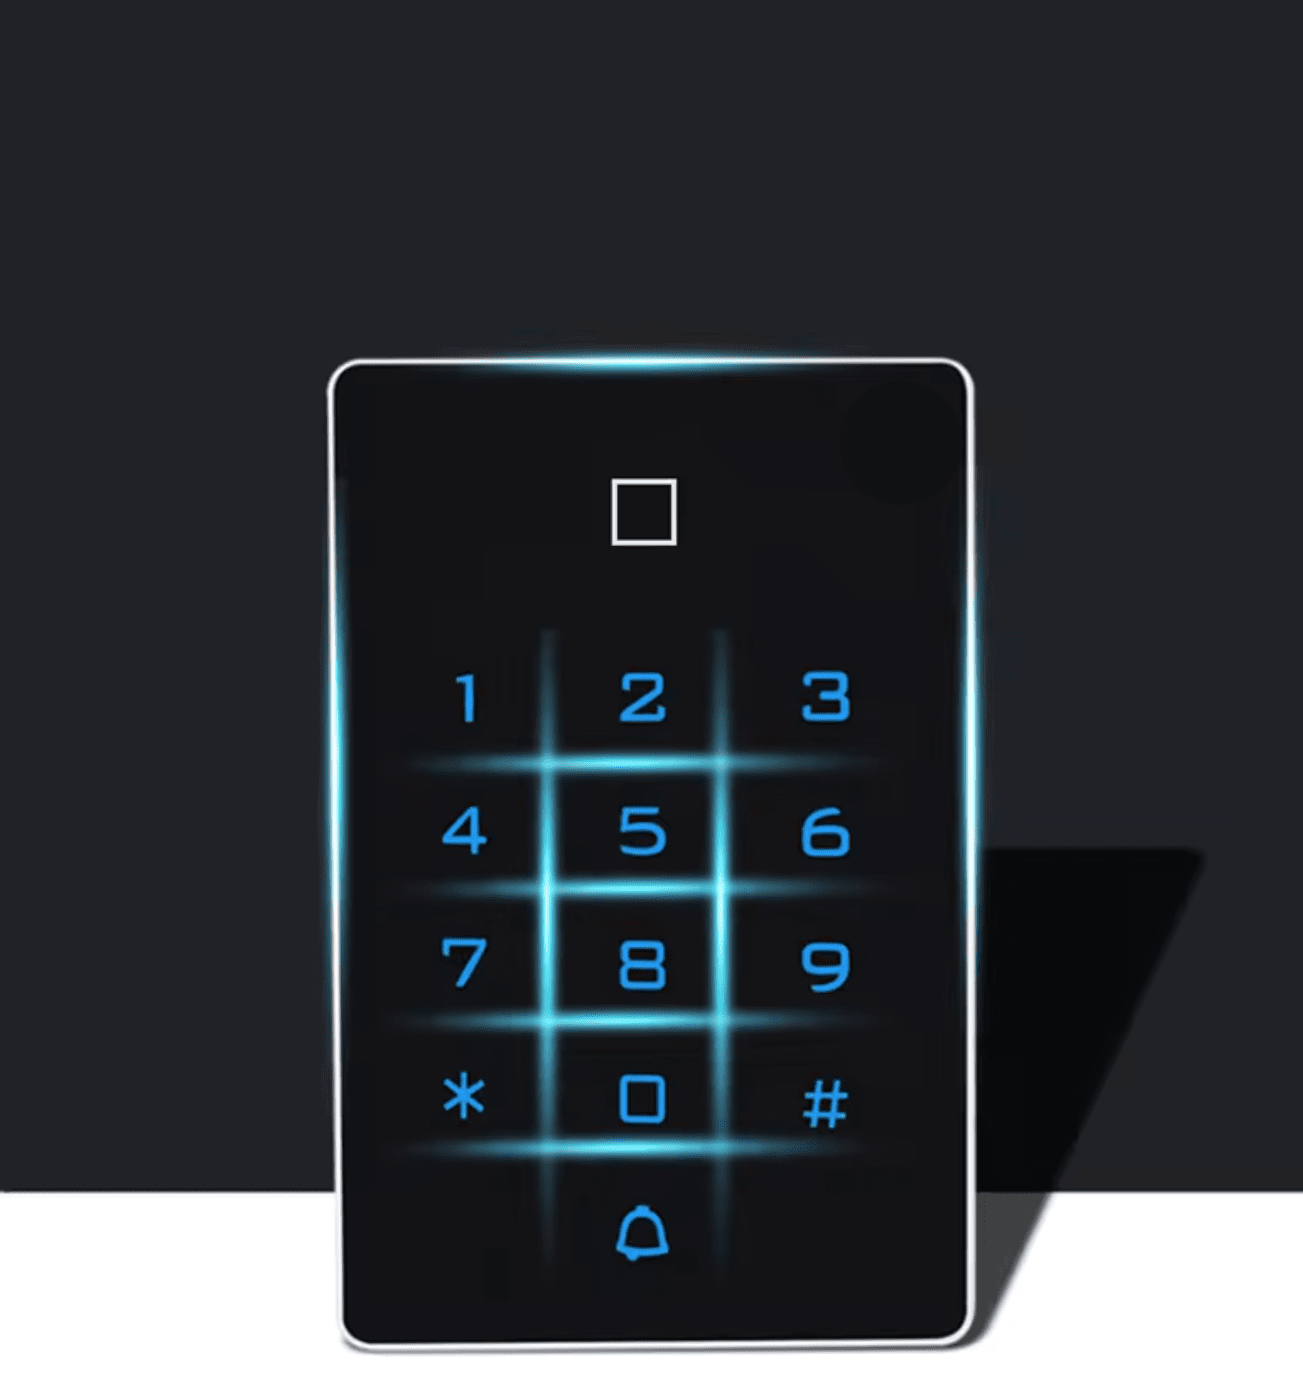
The Spreest keypad code lock is a modern and versatile access control device that provides exceptional flexibility and ease of use. It is ideal for homes, offices, and other facilities requiring an advanced security system. Thanks to its diverse opening methods and easy installation, this lock will meet the expectations of even the most demanding users.

Key features
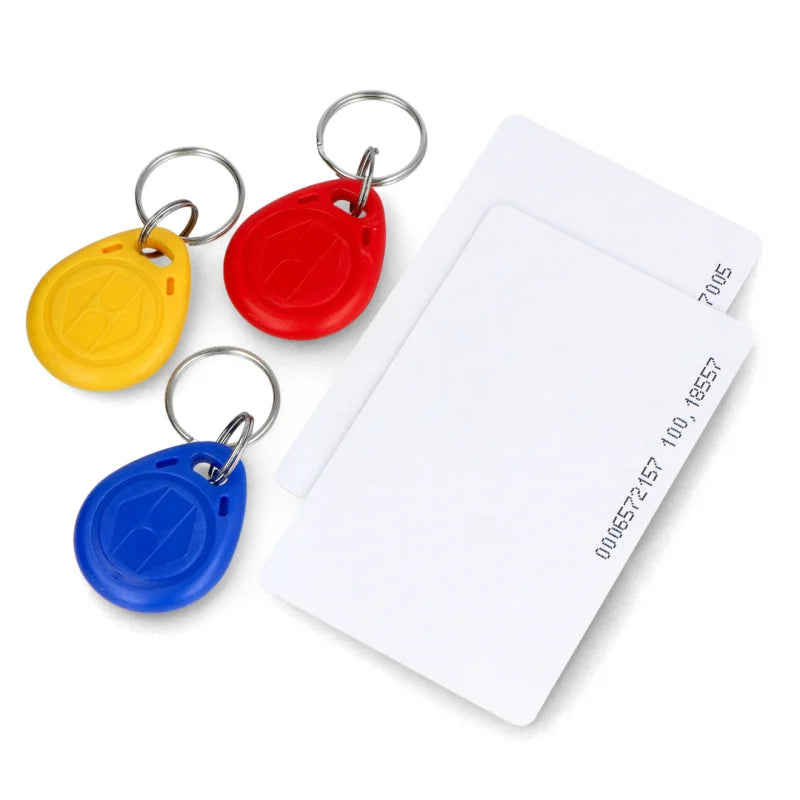
Versatile opening methods: Proximity card/fobs, proximity card/fobs and code, code provide flexibility and ease of use.
LED indicators: Colored LED indicators signal the lock's status, simplifying use and increasing security, as well as excellent digit visibility at night.
Easy installation: Clear instructions and various connection options ensure quick and hassle-free installation.
Ability to connect an external doorbell.
Variety of lock modes:
- Automatic mode - The lock automatically locks when the door is closed.
- Manual mode - The lock locks when you approach an access card or press the exit button (yellow wire connected to the exit button). Install the button next to the exit door.
Simple commands sent to the code lock.

The code lock offers versatility in opening methods to meet your needs and preferences:
1. Proximity card/fobs - Quick and convenient unlocking using a proximity card or fobs.
2. Proximity card/fobs and code - Two solutions. Security that requires a proximity card or fobs, as well as entering a code. If you do not currently have a proximity card or fob with you, you can enter a pre-set code.
3. Code - Enter a unique code on the lock keypad to gain access.
Thanks to these diverse options, every user can choose the most suitable way to open the lock, which enhances comfort and security of use.

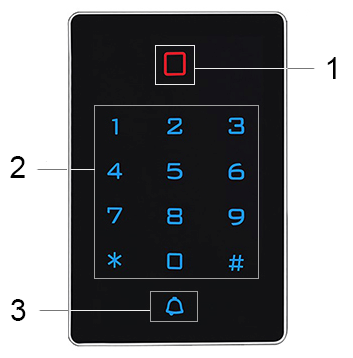
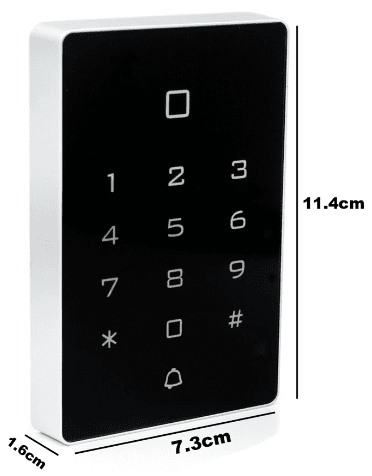
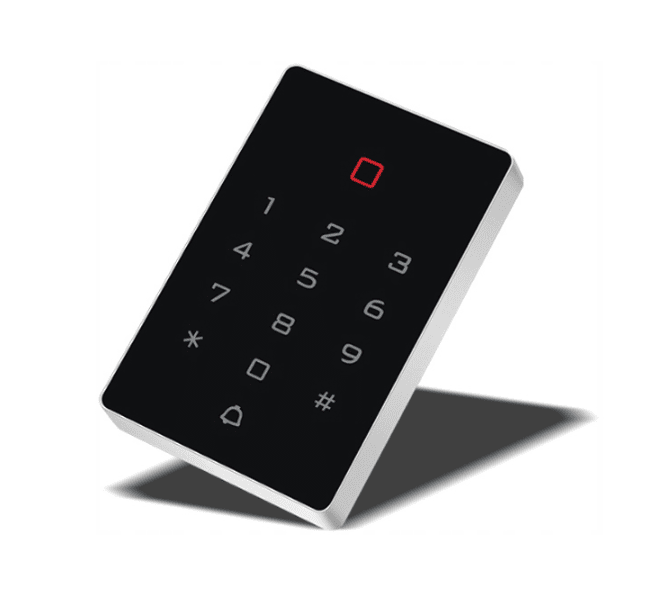
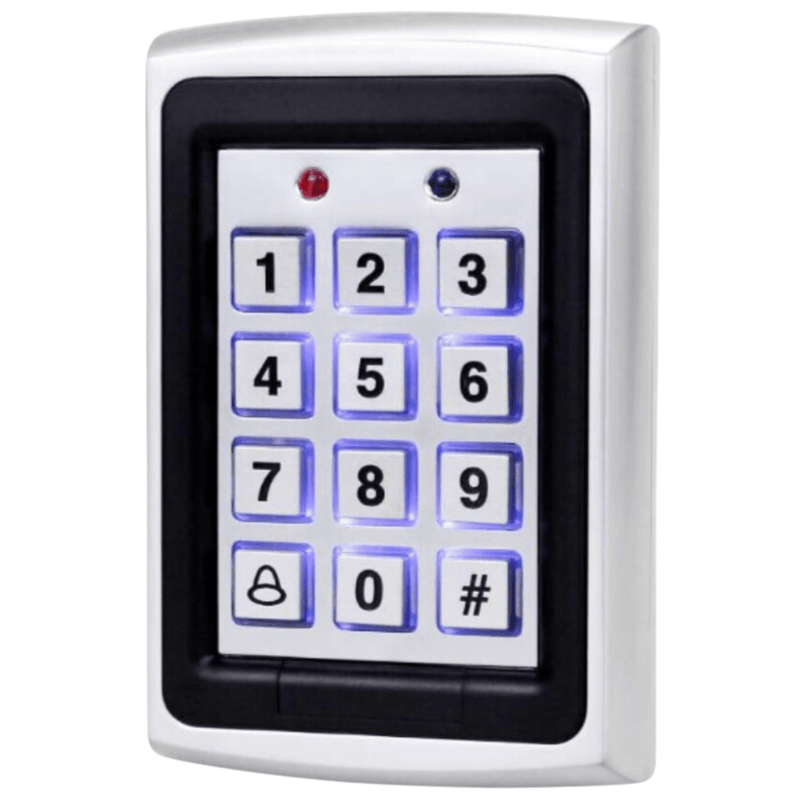
LED display data
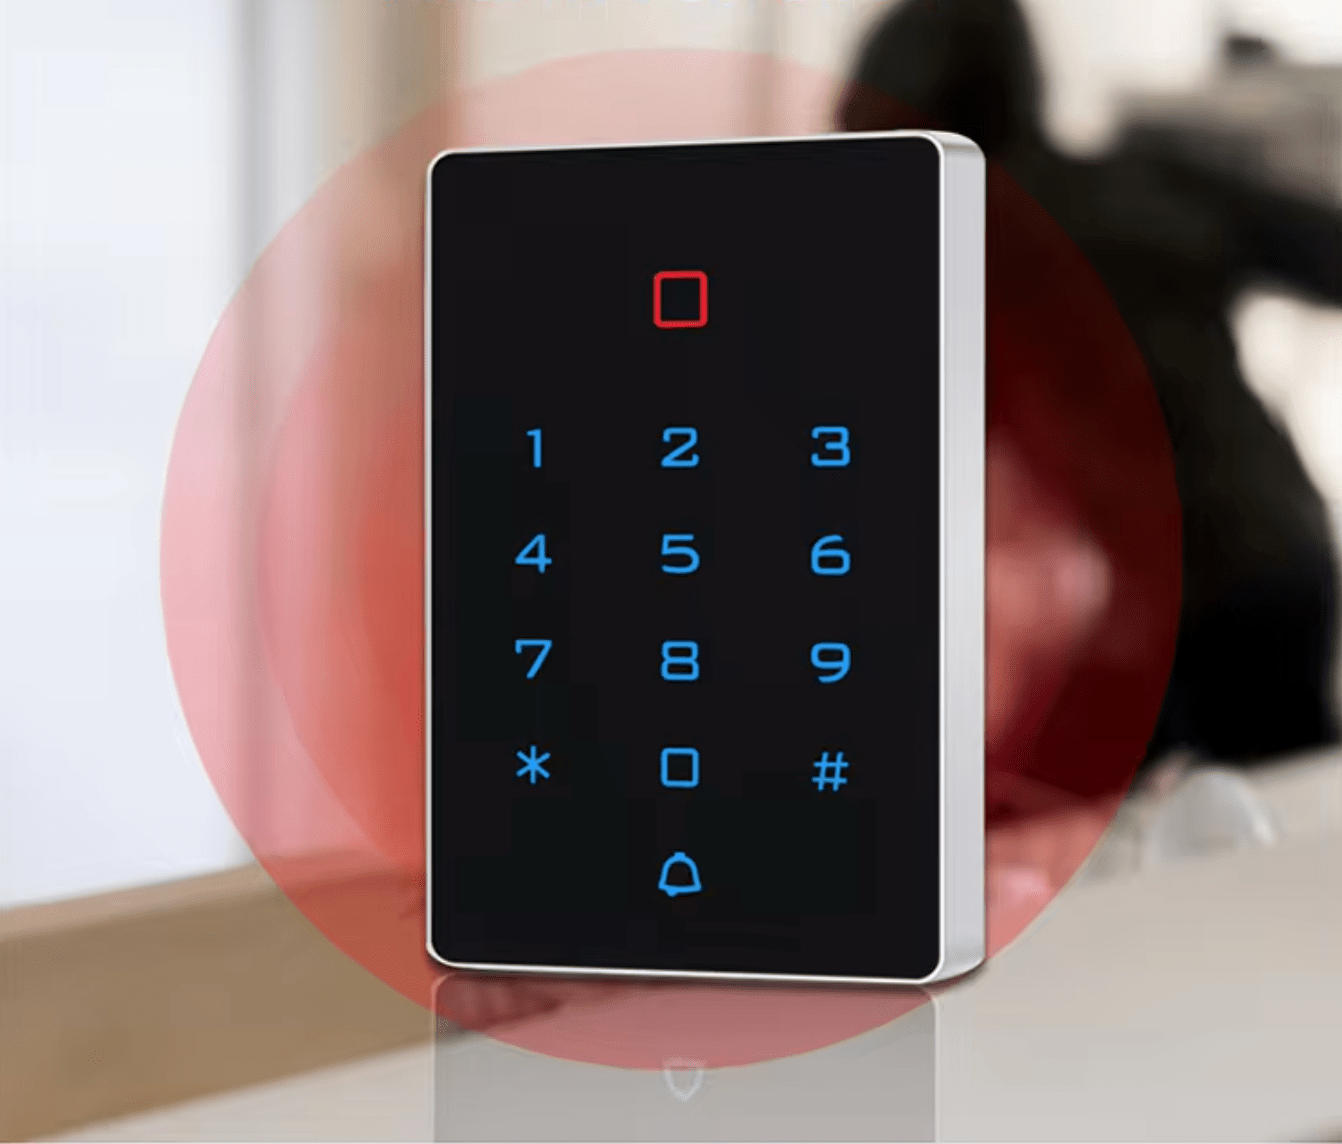
1. Indicator light for lock (red light), unlock (green light)
2. Backlit touch keypad
3. Doorbell button

Our advanced access control device offers diverse connection options, allowing for flexibility and adaptation to various needs.
Below you will find detailed information on available connections and their applications.
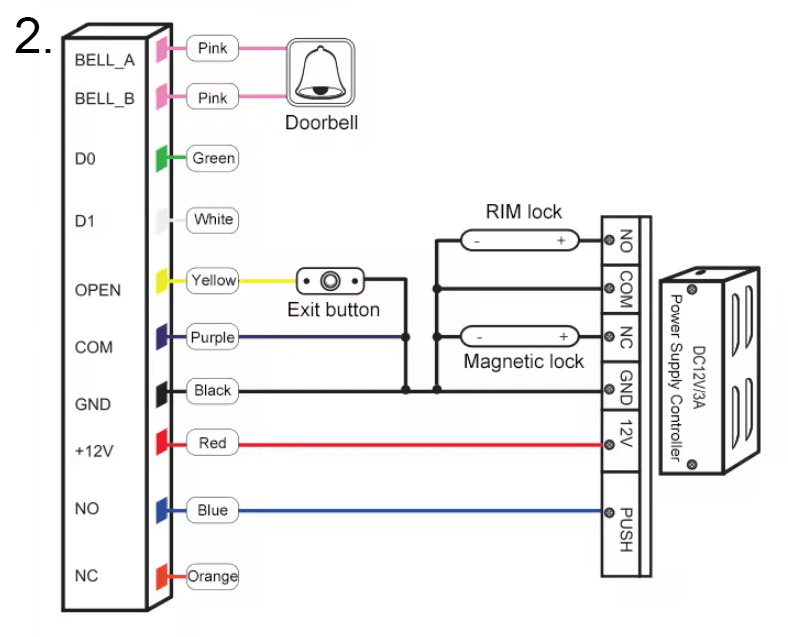
Wire colors and their functions:
1. BELL_A (Pink) - Input for doorbell connection.
2. BELL_B (Pink) - Input for doorbell connection.
3. D0 (Green) - Input for data connection (D0).
4. D1 (White) - Input for data connection (D1).
5. OPEN (Yellow) - Input for exit button connection.
6. COM (Purple) - Common input, used for closing circuits.
7. GND (Black) - Ground input, earthing.
8. NC (Orange) - Input for magnetic lock connection (normally closed).
9. +12V (Red) - 12V power input.
10. NO (Blue) - Input for lock connection (normally open).

Possible connections and their applications:
1. Doorbell connection (BELL_A, BELL_B)
- Connecting pink wires to the doorbell allows notification of access attempts.
- Example: Doorbell connection at the entrance.
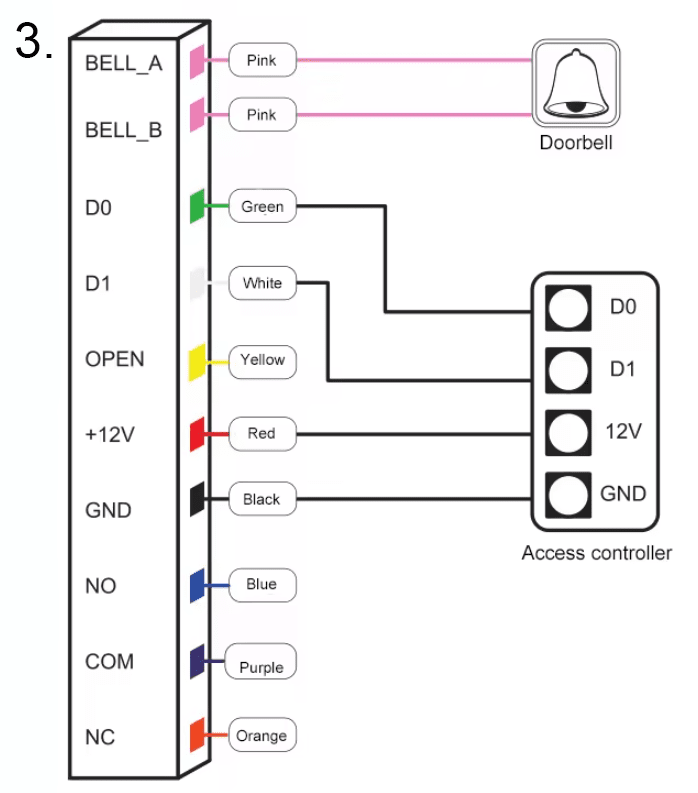
2. Data transmission (D0, D1)
- Green (D0) and white (D1) wires are used for data transmission between access control devices.
- Example: Integration with a building access control system.
3. Exit button (OPEN)
- The yellow wire connected to the exit button allows for quick exit from the secured area.
- Example: Installation of a button next to the exit door.
4. Circuit closing (COM)
- The purple wire (COM) is used as a common wire for closing circuits, activating locks or other devices.
- Example: Connection to various types of electronic locks.
5. Grounding (GND)
- The black wire (GND) ensures stability and safety of connections as grounding.
- Example: Connection of ground for the entire system.
6. Magnetic lock (NC)
- The orange wire (NC) is used for magnetic locks that require continuous power (normally closed).
- Example: Installation of a magnetic lock on a door.
7. Power supply (12V)
- The red wire supplies 12V power to the device or lock.
- Example: Connection to the main power source of the access control system.
8. Normally open (NO)
- The blue wire (NO) is used to connect a lock that is normally open.
- Example: Connection of a rim lock or other type of lock requiring activation.

Additional elements and connections:
- RIM Lock: Ability to connect a rim lock to NO, COM, NC outputs.
- Power controller (DC12V/3A): Provides appropriate power supply and energy management for the lock and other connected devices.
- Access controller: Integration with an access controller for full system control.

Technical specification
- Operating voltage: DC12V
- Card reading distance: 2 ~ 5 cm
- Operating temperature: -40℃ ~ 60℃
- Lock output load: ≤3A
- Standby current: ≤30mA
- Capacity: 2000 users
- Door relay time: 0 ~ 99 S (adjustable)
- Humidity measurement range: 10% ~ 90%

Set includes
- 1x T12 ID EM keypad code lock
- 2x Screws
- 2x Dowels
- 1x User manual
The user manual in Polish is available as an attachment for download. You will find it below or above our product description.
Most interesting commands for managing the lock:
1. Change administrator code: Allows easy change of the default administrator code, increasing security.
- Command: * Master code # 0 New code # New code #
2. Add cards: Allows continuous adding of cards, ideal for large groups of users.
- Command: * Master code # 1 Read card # ... #
3. Add card numbers: Allows adding cards using 8- or 10-digit numbers.
- Command: * Master code # 1 8 digits or 10 digits #
4. Add users with ID number and card: Facilitates user management by assigning an ID number to a card.
- Command: * Master code # 1 ID number # Read card #
5. Add users with ID number and card number: Allows precise assignment of a card number to a user.
- Command: * Master code # 1 ID number # 8 digits or 10 digits #
6. Add PIN codes: Allows adding users with an ID number and a unique 4-digit PIN code.
- Command: * Master code # 1 ID number # 4 digits Pin code #
7. Delete cards: Allows individual deletion of cards or deletion by number.
- Command: * Master code # 2 Read card or 8 digits or 10 digits #
8. Delete users with ID number: Useful in case of a lost card, allows deletion of a user by ID number.
- Command: * Master code # 2 ID number #
9. Delete all users: Quickly deletes all users except the public PIN code.
- Command: * Master code # 2 0000 #
10. Access methods:
- Card only: * Master code # 30 #
- Card + PIN code: * Master code # 31 #
- Card or PIN code: * Master code # 32 # (default)
11. Door opening time: Adjust the door opening time from 0 to 99 seconds (default 5 seconds).
- Command: * Master code # 4 0 ~ 99 #
12. Operating modes:
- Automatic mode: * Master code # 50 #
- Relay switching mode: * Master code # 51 #
- Reader mode: * Master code # 52 26/34 #
13. Data backup:
- Data entry: * Master code # 71 #
- Data exit: * Master code # 70 #
14. Add public code: Ability to add one public code.
- Command: * Master code # 9 4 digits code #