

Mini WiFi Camera A8S
Najniższa cena z 30 dni przed obniżką: 157,99 zł

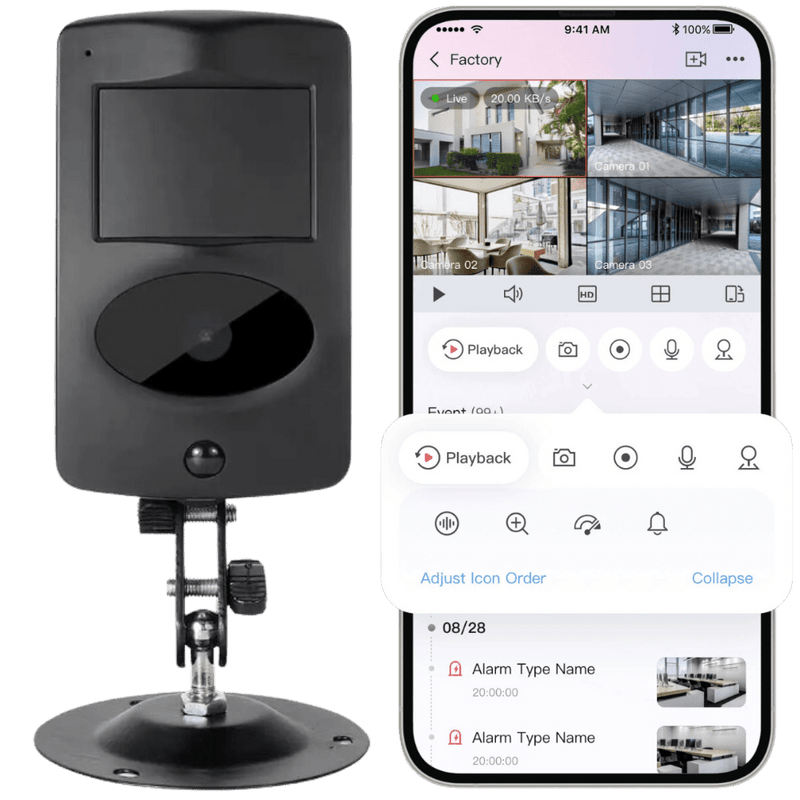


The modern Spreest mini WiFi camera is an ideal solution for monitoring your home, office, or shop. Its discreet design resembles a smoke detector, allowing it to blend perfectly into any interior without attracting attention.
Thanks to advanced features such as full 360° panorama, two-way voice communication, and night mode, the camera provides complete security and reliable protection around the clock.
The high-quality lens guarantees a clear image, and the built-in motion sensor will immediately notify you of unwanted events.
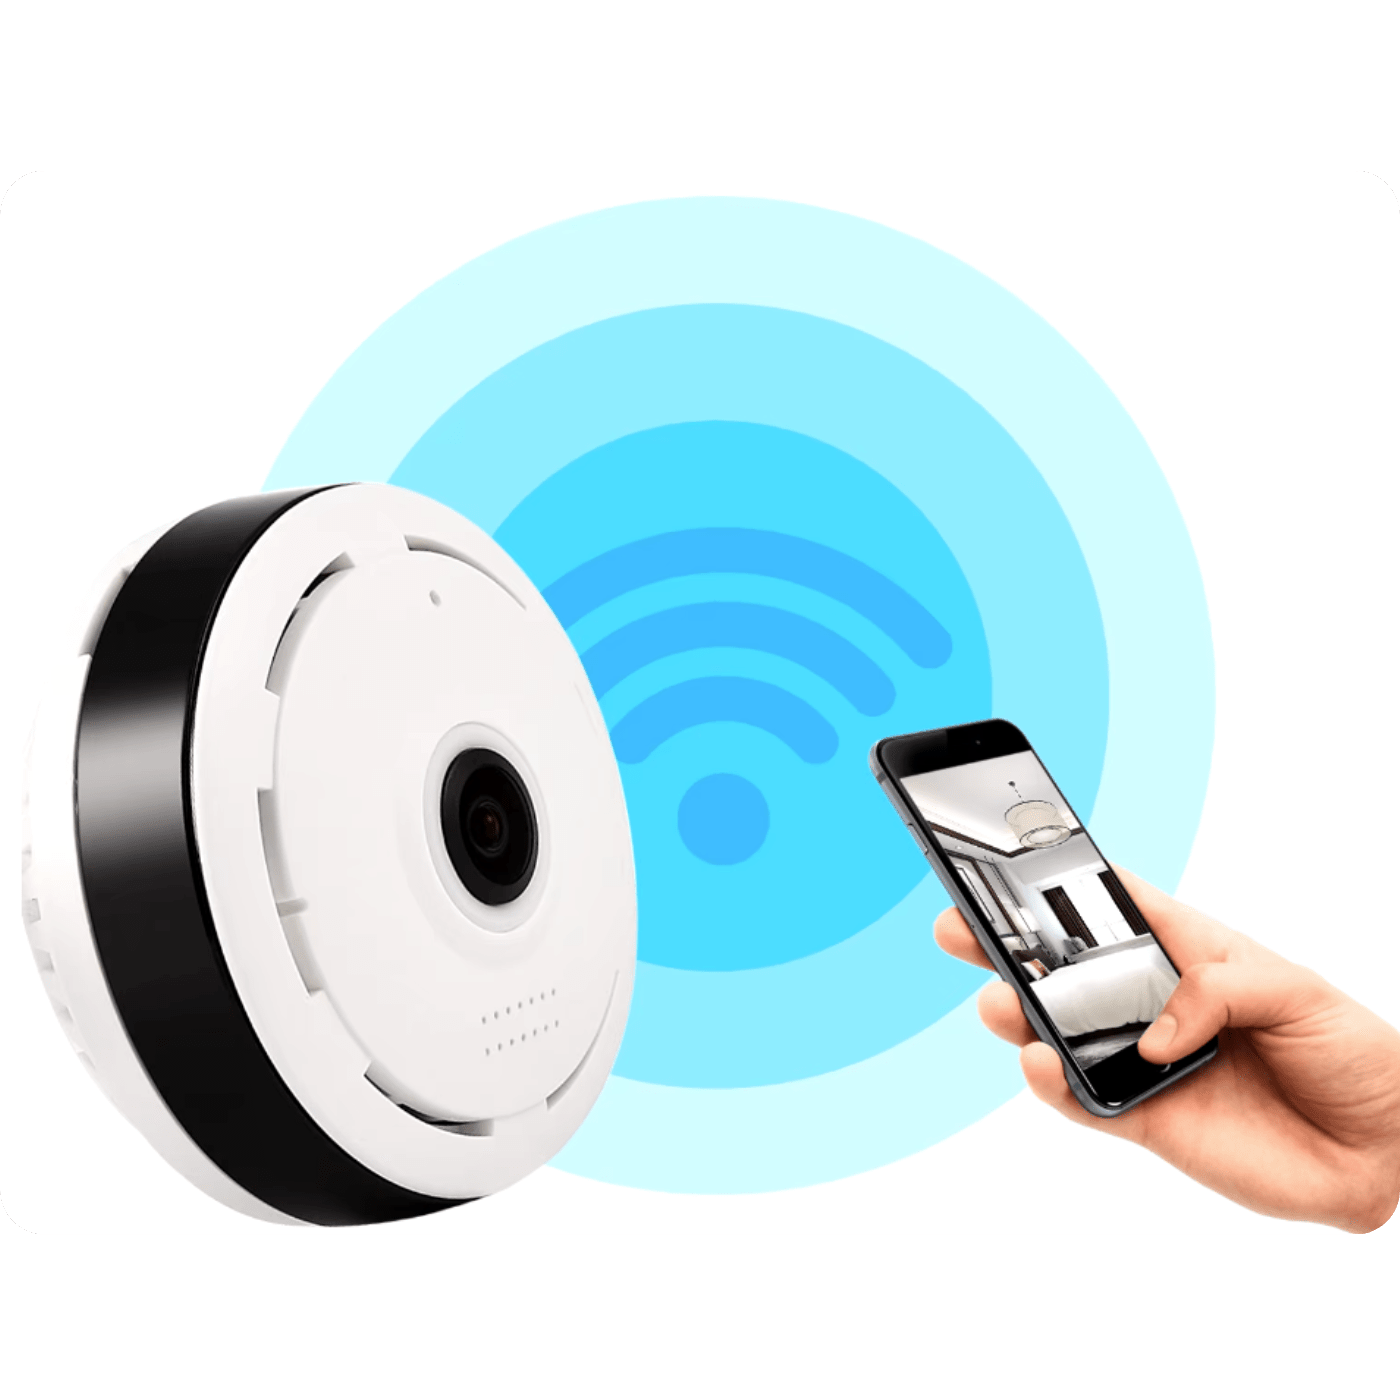
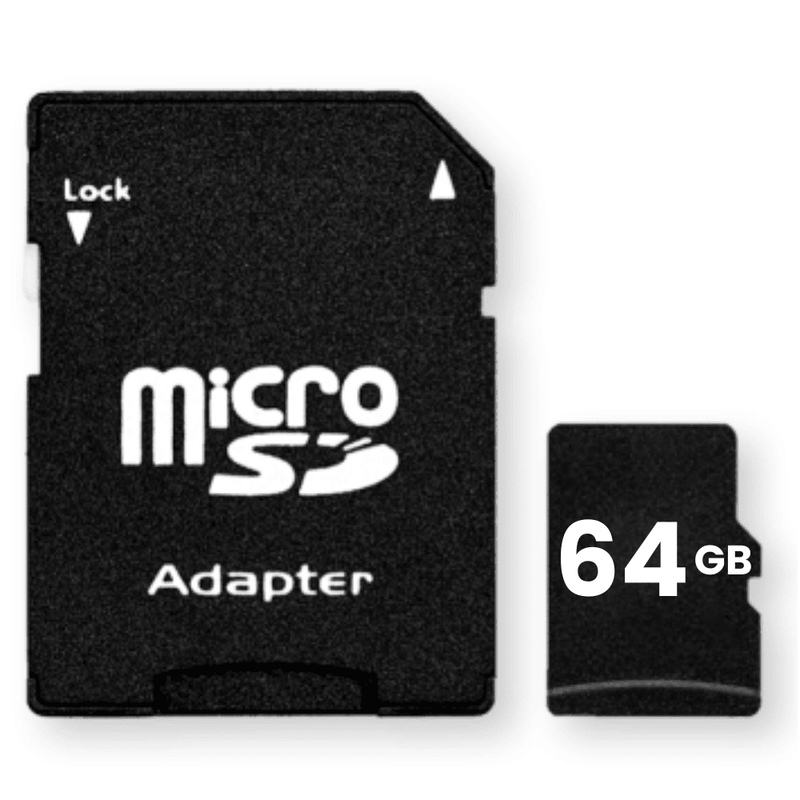
With the app for iOS and Android, you can conveniently manage the camera from anywhere, review recordings, and configure settings. Support for SD cards up to 64 GB and loop recording ensure long-term event storage, making the camera meet the expectations of even the most demanding users.

Key Features
1. Intuitive app: Available for iOS and Android, it allows remote monitoring, settings management, and reviewing recordings from anywhere in real-time.
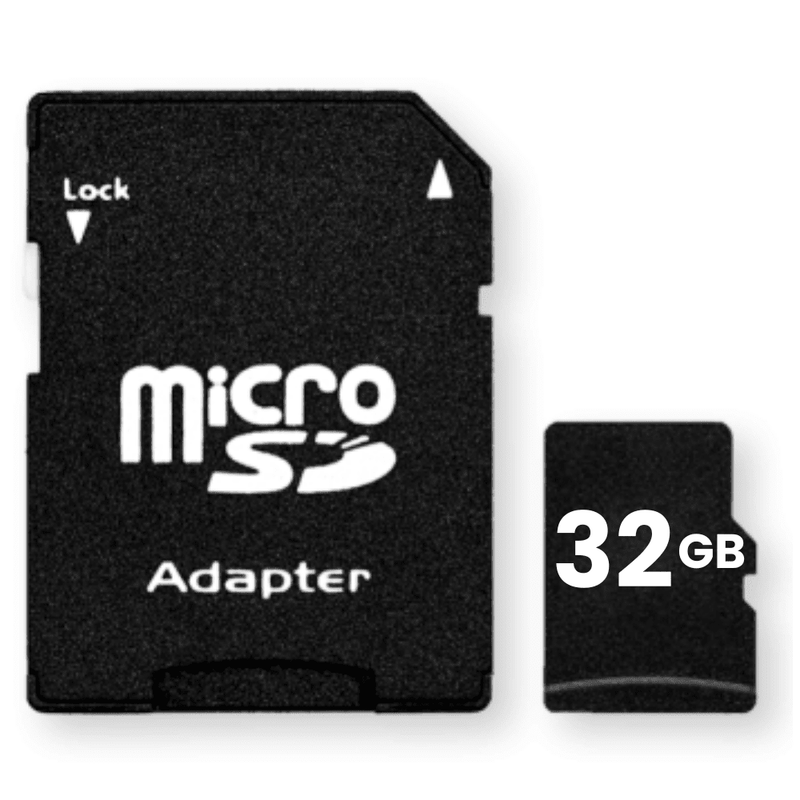
2. Supports micro SD cards up to 64 GB: An external memory card slot allows for easy management of recordings without the need to disassemble the device.
3. Discreet design: Its smoke detector-like appearance makes the camera blend perfectly into any interior, without attracting attention.
4. Motion detection with notifications: The camera immediately sends notifications to the user's device when it detects motion, and the ability to record only upon detection saves memory card space.
5. Full 360° panorama: Thanks to the "fisheye" lens, the camera provides a full 360-degree view, allowing monitoring of the entire room without blind spots.
6. Two-way voice communication: The built-in microphone and speaker allow listening and transmitting messages in real-time, which is ideal for communicating with household members or deterring intruders.
7. Night mode with IR CUT technology: Automatic switching to night mode in low light conditions enables 24-hour image recording.
8. High-quality image: The lens provides clear and detailed recordings, allowing for precise monitoring of the observed area.
9. Loop recording: The function of overwriting the oldest recordings guarantees continuous event recording, without the risk of filling up the memory card.
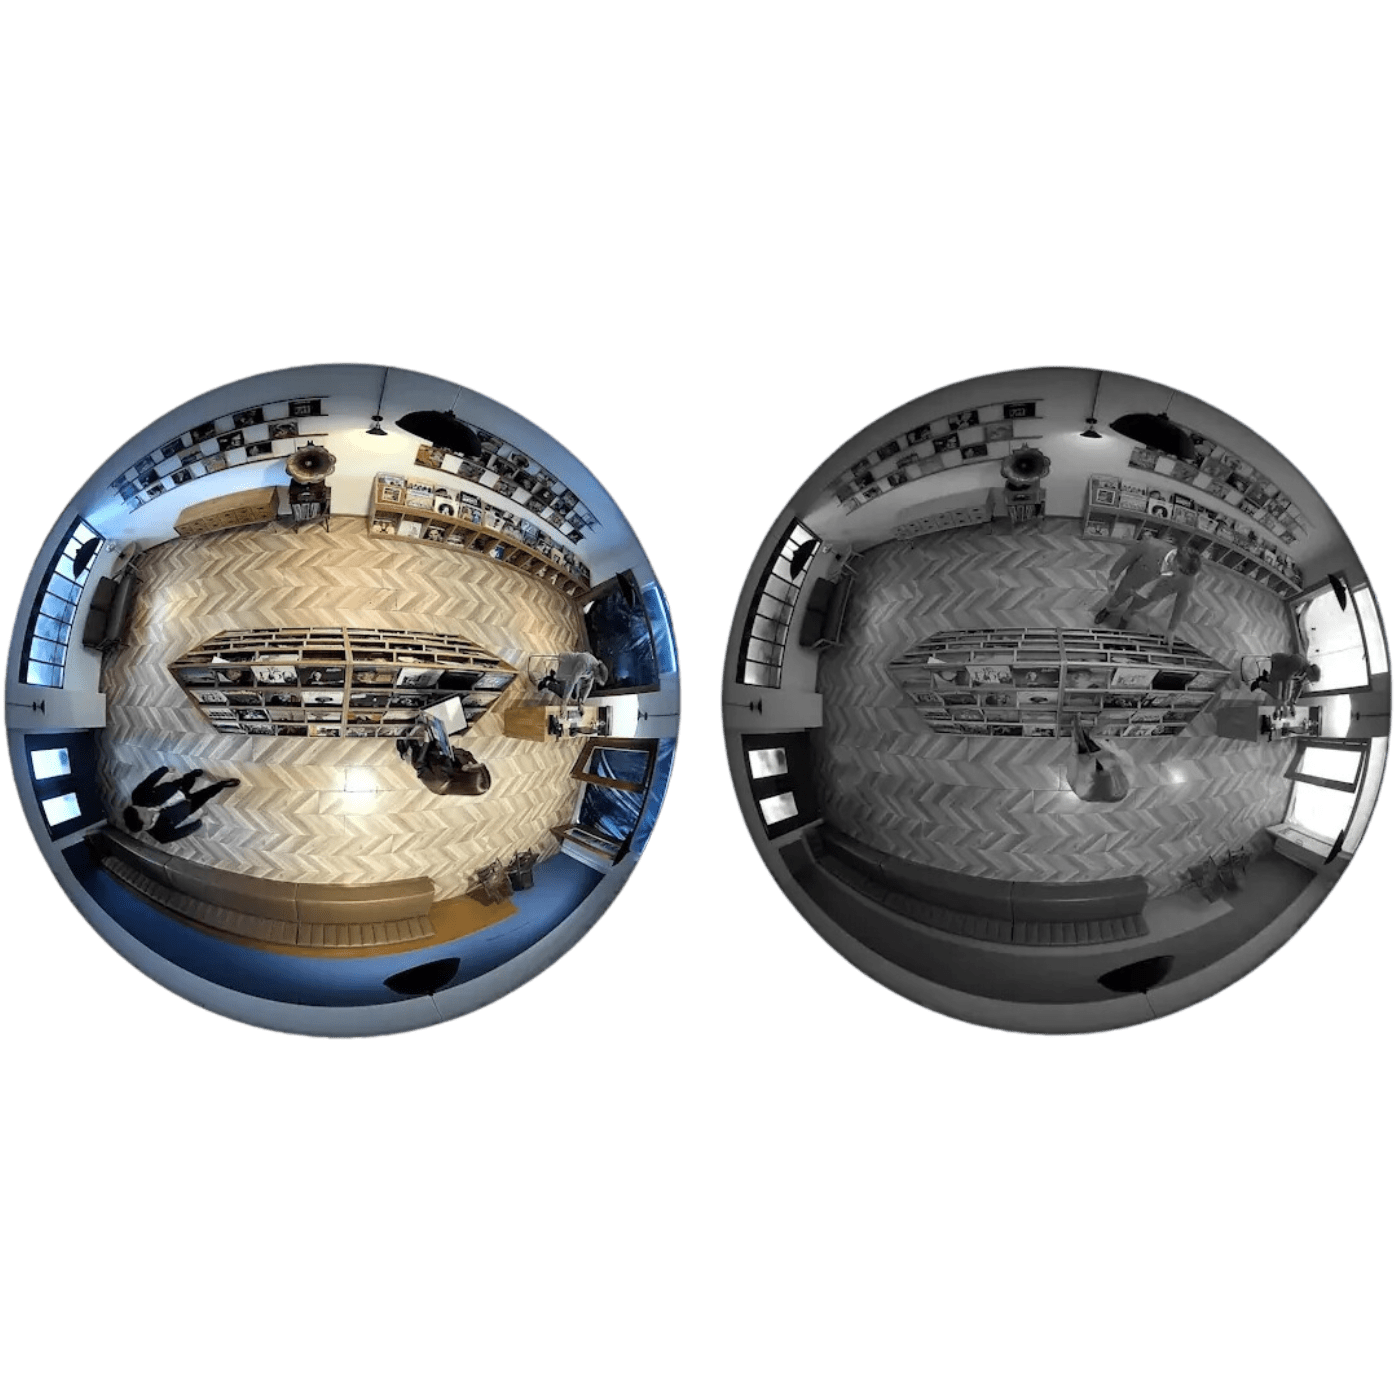
10. Various operating modes: The camera automatically adjusts the image to lighting conditions, offering automatic, color, and black-and-white modes.
11. Secure cloud storage (additional cost): The option to subscribe to a cloud storage service for recordings, ensuring access to recordings even if the camera is damaged.
12. Compact dimensions: The small size and lightweight design make the camera easy to mount and discreet. It also has a USB cable that is approximately 3 meters long.

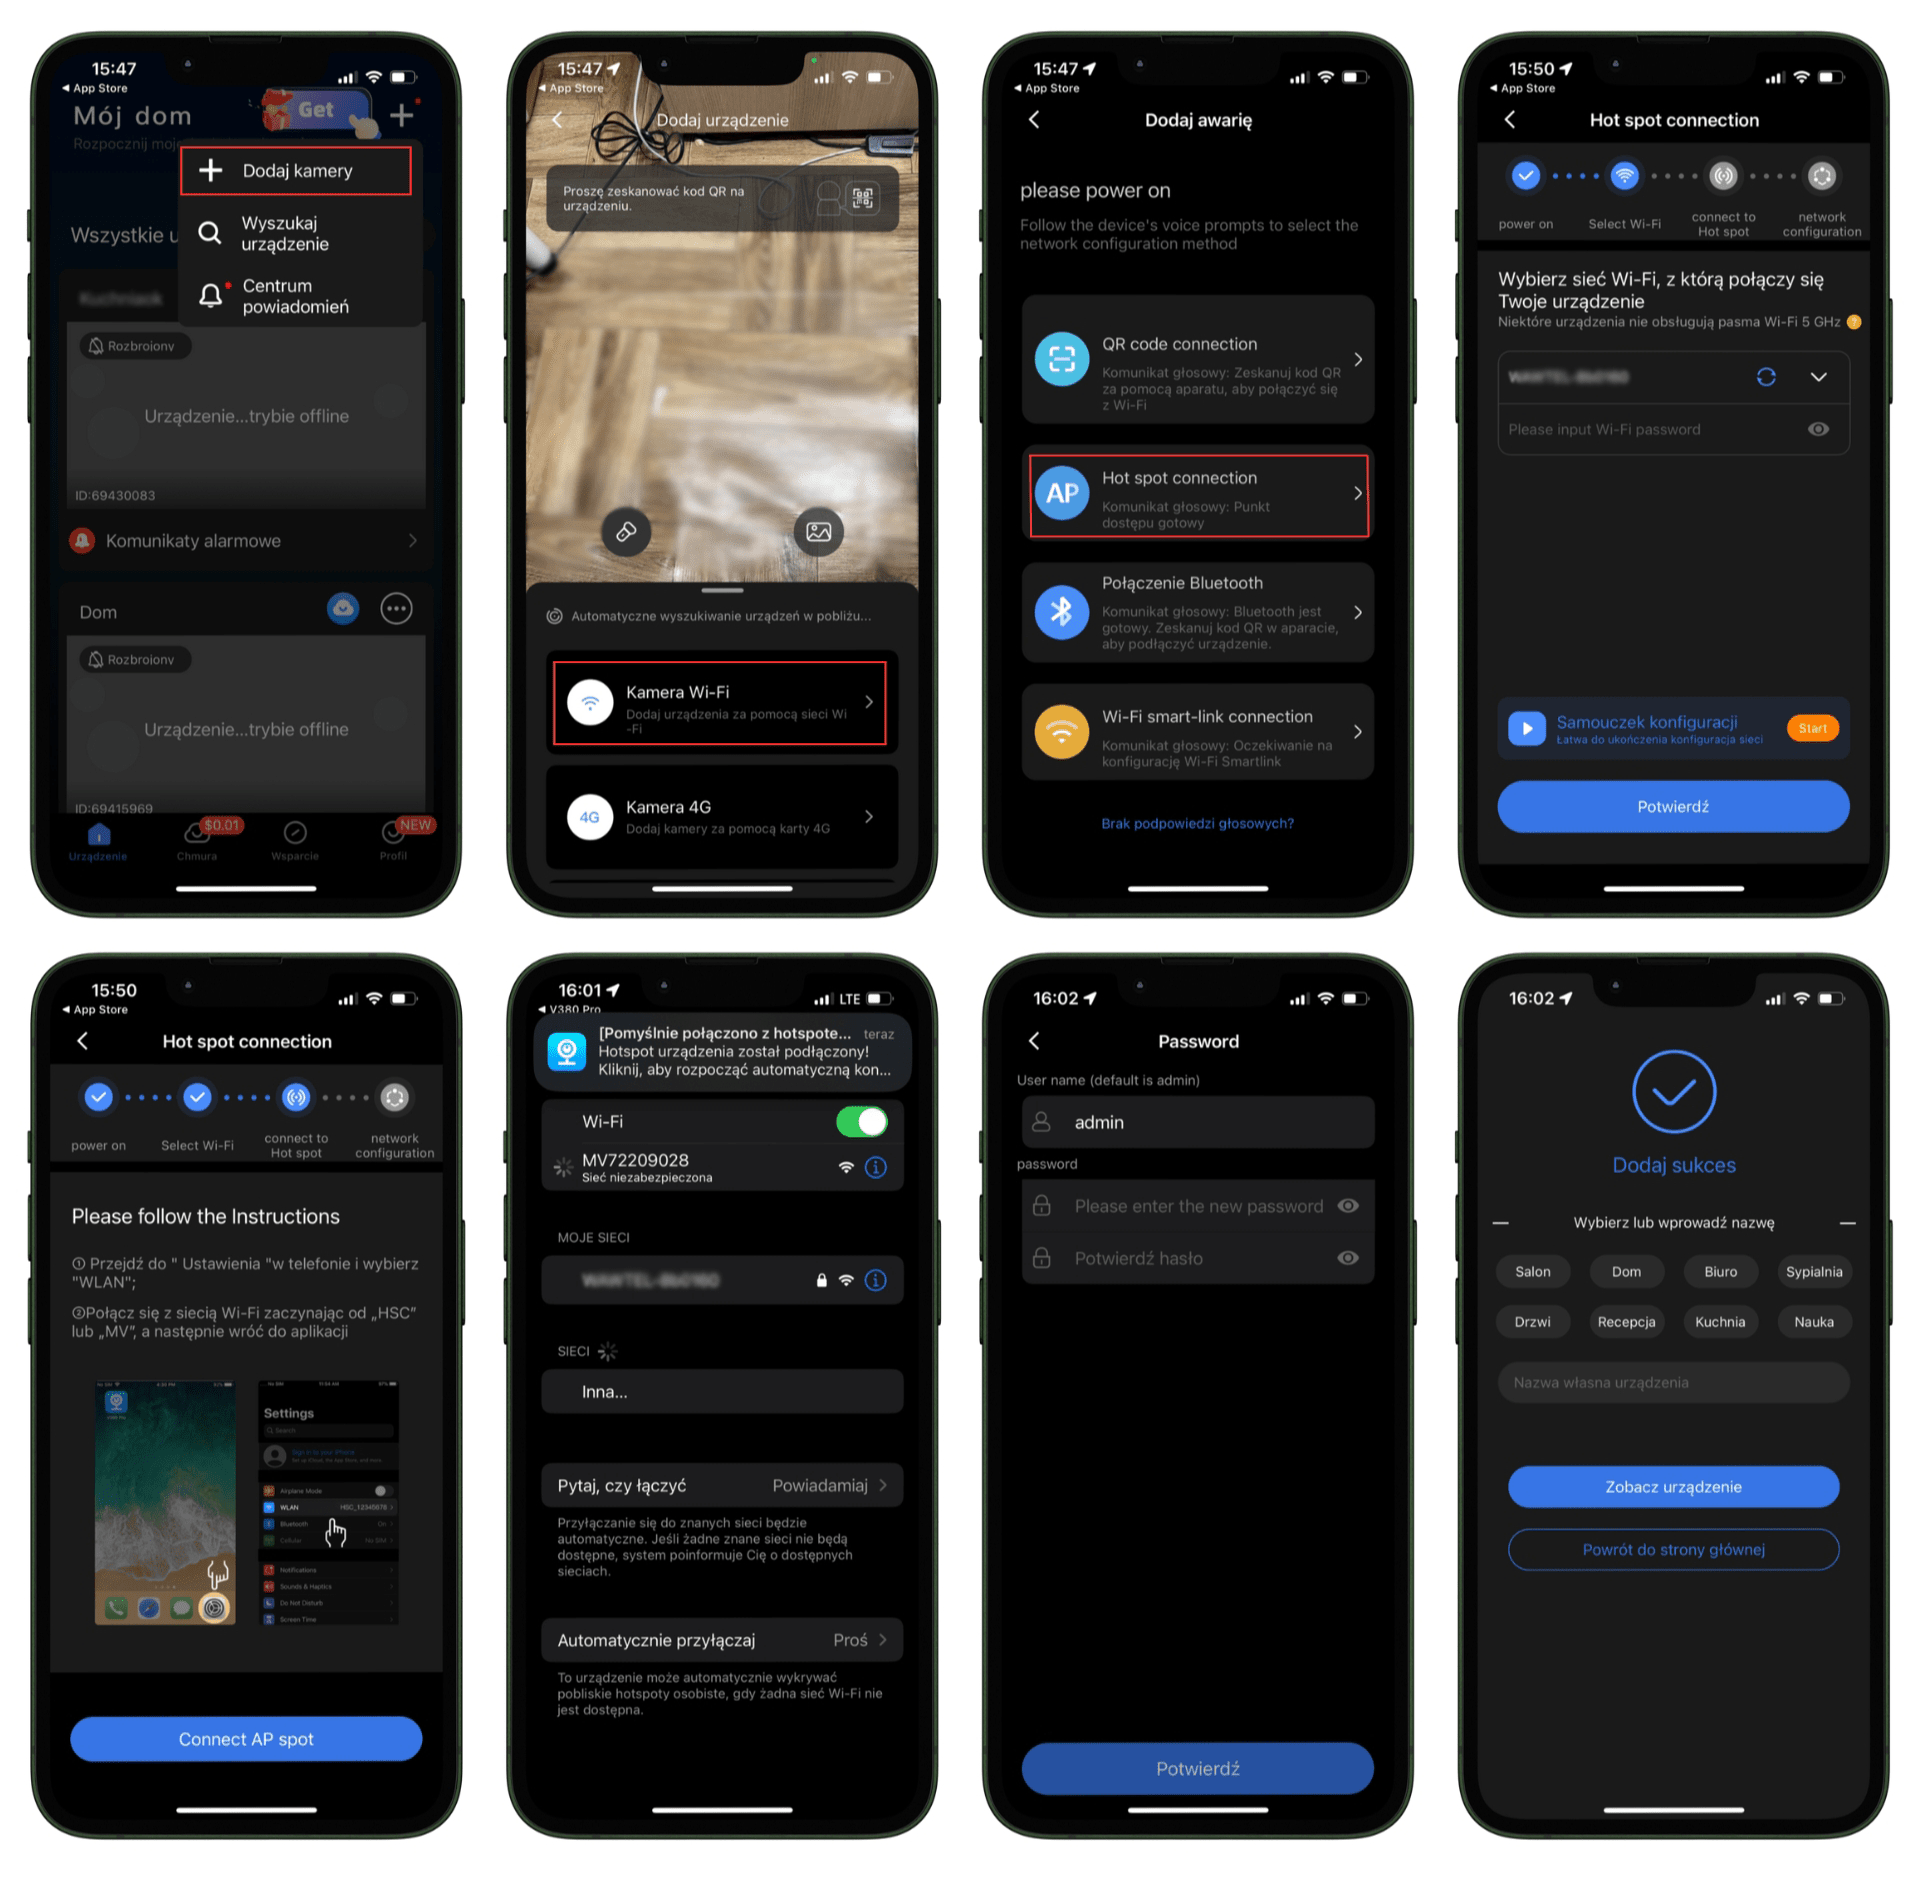
To connect to the mini camera, simply follow these steps:
1. Add camera: Open the mobile app and select the "Add Cameras" option in the main menu.
2. Select camera: From the list of available devices, choose "Wi-Fi Camera".
3. Select configuration method: In the next step, choose "Hot spot connection".
4. Select Wi-Fi network: Select the Wi-Fi network you want to connect the camera to and enter its password. Then click "Confirm".
5. Configuration instructions: Follow the on-screen instructions to complete the configuration process.
6. Connection confirmation: After a successful connection, the app will display a message confirming the camera's successful connection to the Wi-Fi network.
7. Set password: Enter a new password for the camera to secure access to the device.
8. Add camera: After setting the password, you can name your camera and add it to the selected location in the app.
After completing the above steps, the camera will be ready for use and remote monitoring via the app.

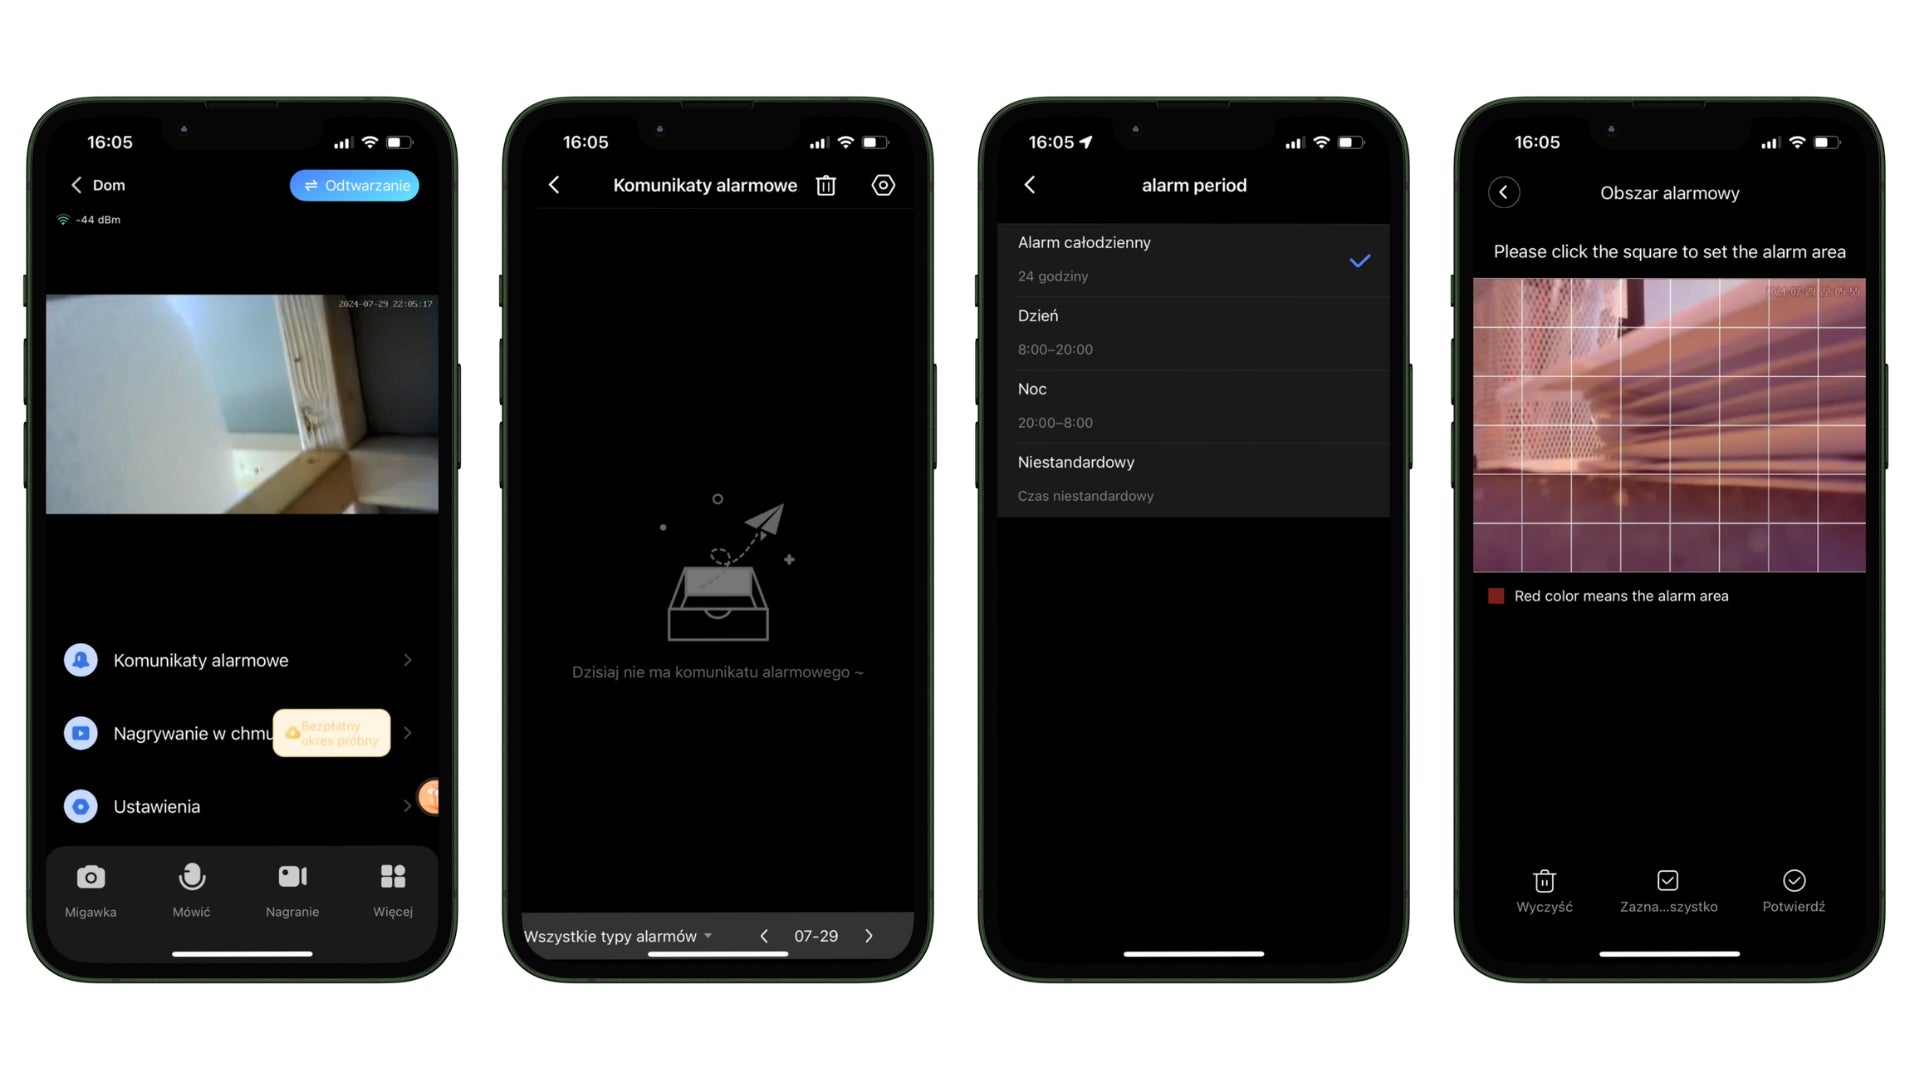
To configure alerts, motion detection, and review alarm history, follow these steps:
1. Alert Configuration:
Go to the "Alarm messages" section in the application.
Set alarm periods by choosing one of the available options:
- All-day alarm (24 hours): If you want the camera to be active all day.
- Day (8:00 AM – 8:00 PM): Setting suitable for office monitoring during working hours.
- Night (8:00 PM – 8:00 AM): Ideal for home monitoring while sleeping.
- Custom (choose your own time): For example, if you want the camera to be active only from 10:00 AM to 2:00 PM.
2. Area motion detection:
Select the "Alarm area" option in the application.
Click on the grid displayed on the screen to mark the areas that are to be monitored.
- Example: Mark the area near the entrance door to detect movement only in that specific location.
Areas marked in red will be active in motion detection.
3. Alert history:
Go to the "Alarm messages" section to view stored alarm messages.
The application will display a list of registered alarms, allowing easy management and review of event history.
- Example: If motion was detected at night, the history will show the exact time and date of this event, allowing you to check what exactly happened.

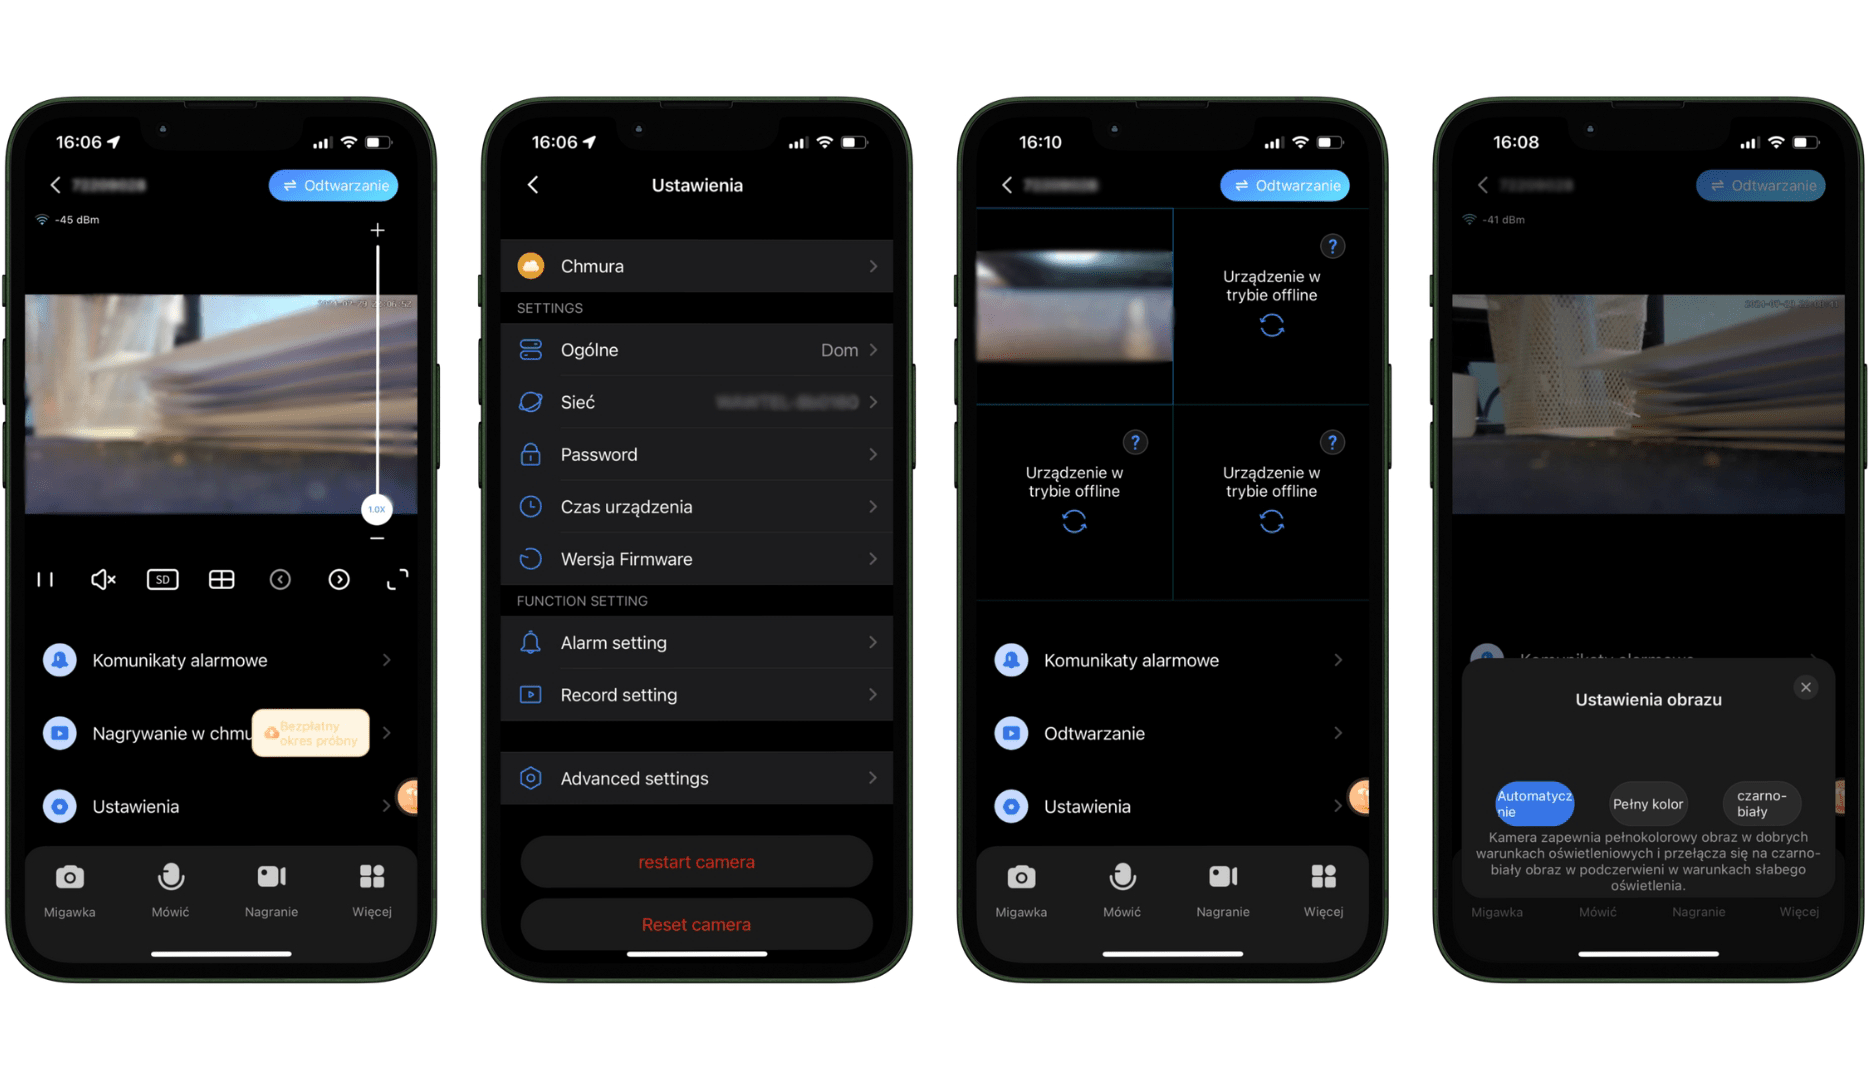
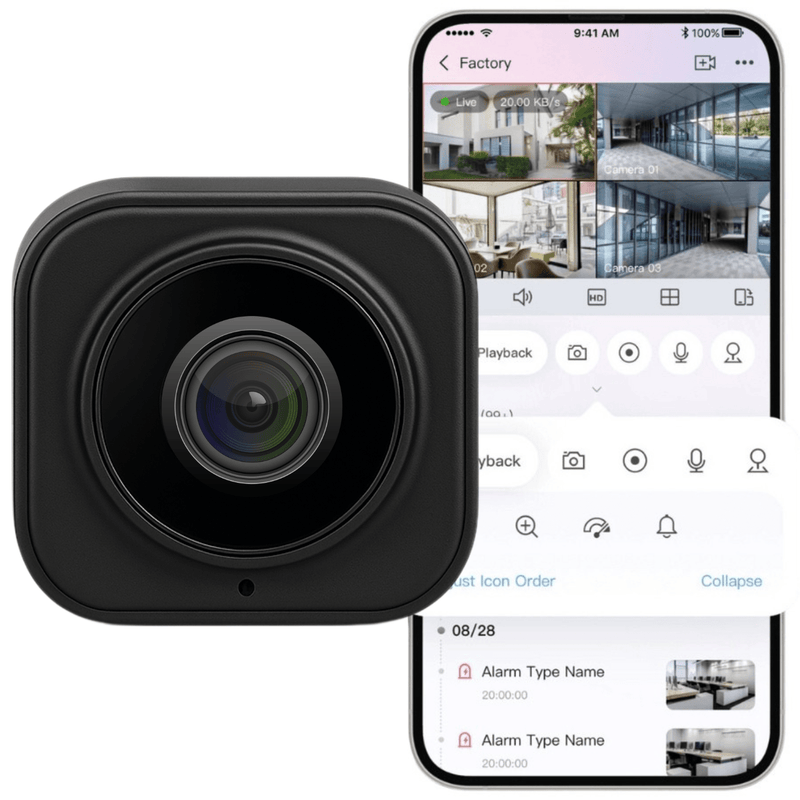
The camera offers an intuitive user interface that allows easy device management and customization of settings to individual needs. Below is a description of the main functions available in the application:
1. Main view:
In the main view of the application, you can observe the live image from the camera. Options such as playing recordings, alarm messages, and access to camera settings are available.
- Example: You can instantly see what is happening in the monitored room and quickly react to any disturbing events.
2. Camera settings:
In the camera settings section, you have access to various configuration options, such as network, password, device time, software version, and advanced settings.
- Example: You can change the camera access password to increase security, or update the software to use the latest features.
3. Split view for multiple cameras:
The application allows simultaneous monitoring of images from multiple cameras in split-screen mode. This is particularly useful when you have several cameras installed in different rooms.
- Example: Monitor the living room, kitchen, and home entrance simultaneously to have a full overview of what is happening throughout the house.
4. Preview mode settings in different lighting conditions:
The camera automatically adjusts the image to lighting conditions, switching between color and black-and-white mode depending on the amount of light.
You can also manually set the image mode: automatic, full color, or black and white.
- Example: In automatic mode, the camera displays a color image in good lighting conditions and switches to a black and white image in low light, ensuring a clear image regardless of the time of day.

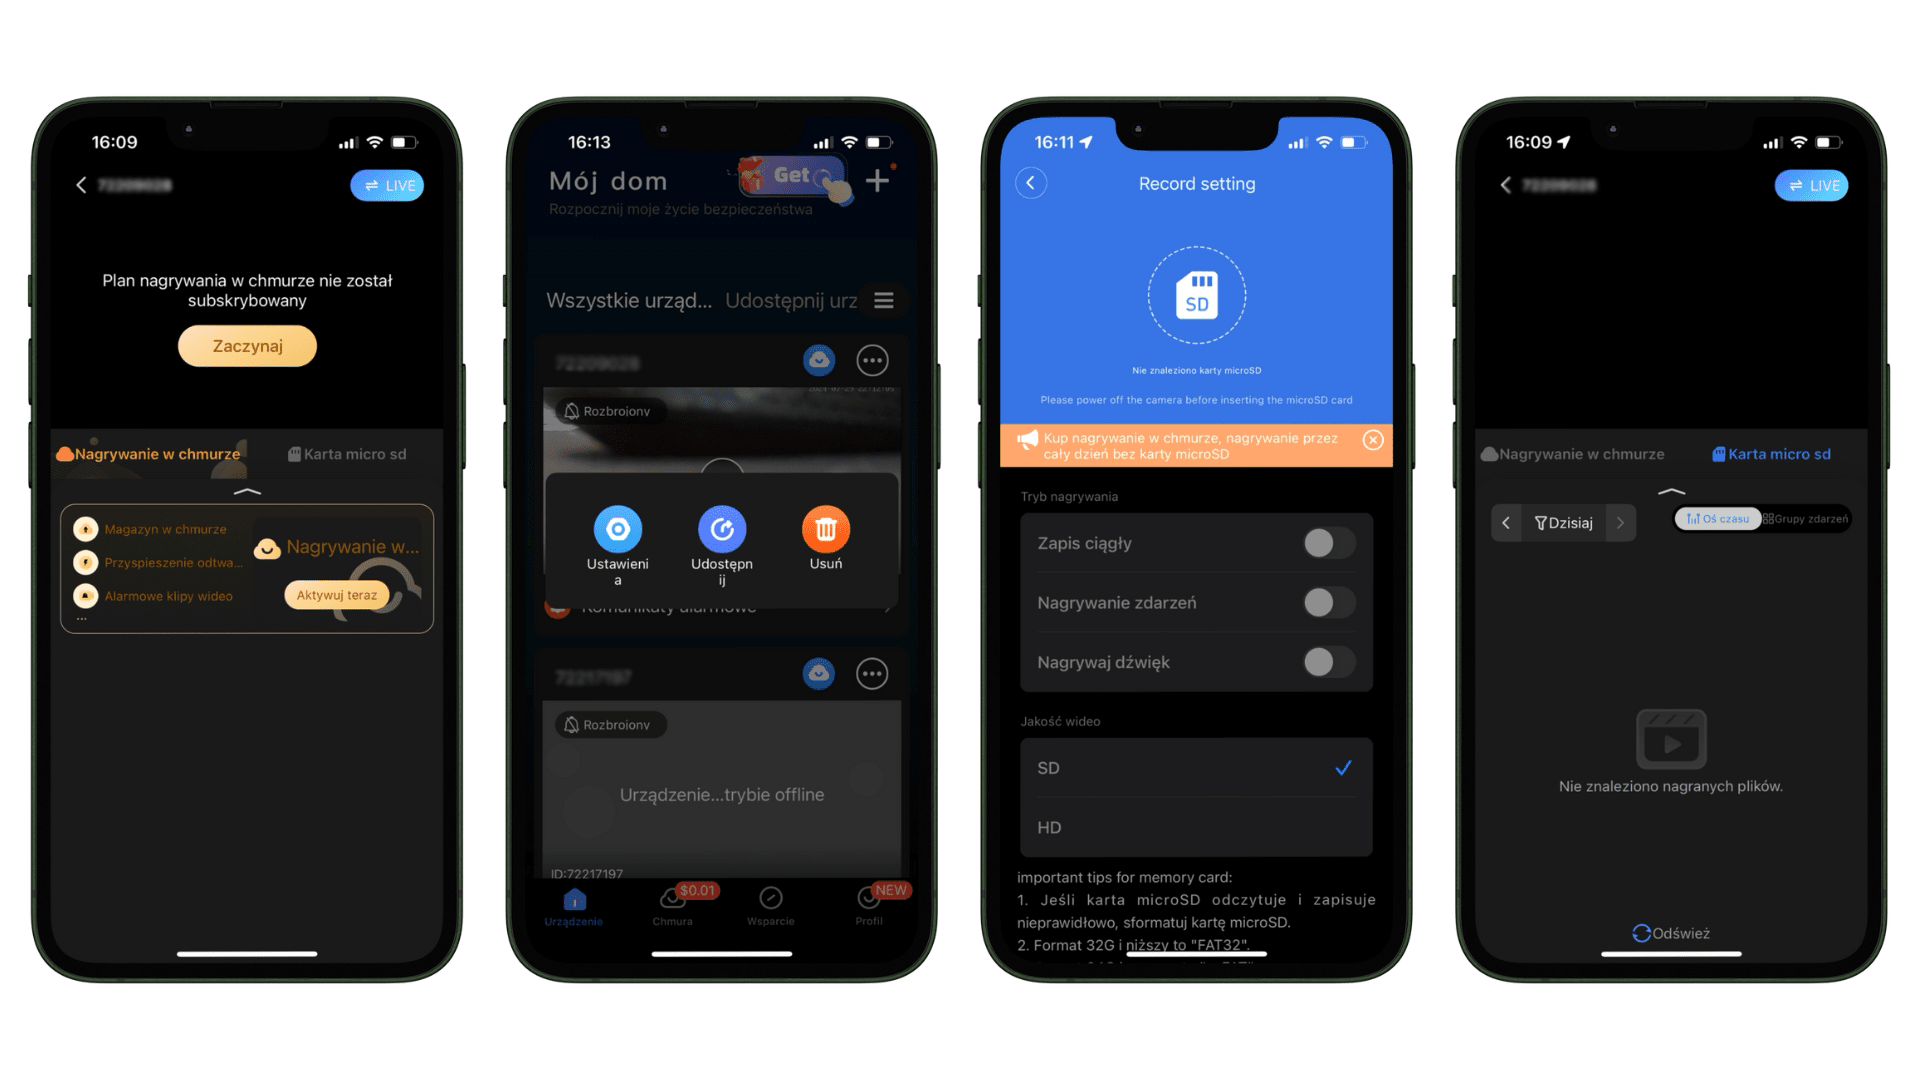
It offers versatile capabilities for recording, sharing, managing the memory card, and viewing recordings from the card in the app. To fully utilize these functions, follow the steps below:
1. Cloud recording option (additional cost):
In the app, select the "Cloud recording" option and click "Start" to subscribe to the service.
After activating the subscription, you can use cloud storage, which ensures secure storage of recordings and allows them to be viewed from anywhere.
- Example: Upon motion detection, the recording is automatically saved to the cloud, so you have access to it even if the camera is damaged.
2. Sharing:
Select the camera you want to share by clicking the "Share" icon in the device settings.
Add users with whom you want to share access to the camera, allowing them to view live streams and saved recordings.
- Example: Share the camera with family members so they can monitor the home during your absence.
3. Memory card management:
Go to the camera's "Settings" section and select "Micro SD Card".
Configure recording modes, such as continuous recording, event recording, and audio recording, to customize the camera's operation to your needs.
Make sure the microSD card is properly formatted (e.g., to FAT32) and ready for use.
- Example: Choose event recording mode to save space on the card and record only when the camera detects motion.
4. Viewing recordings from the card in the app:
Go to the "Cloud recording" or "Micro SD Card" section in the app to view saved recordings.
Filter recordings by date and time, allowing quick retrieval of the material you are interested in.
- Example: Check recordings from the previous day to see what happened at home during your absence.

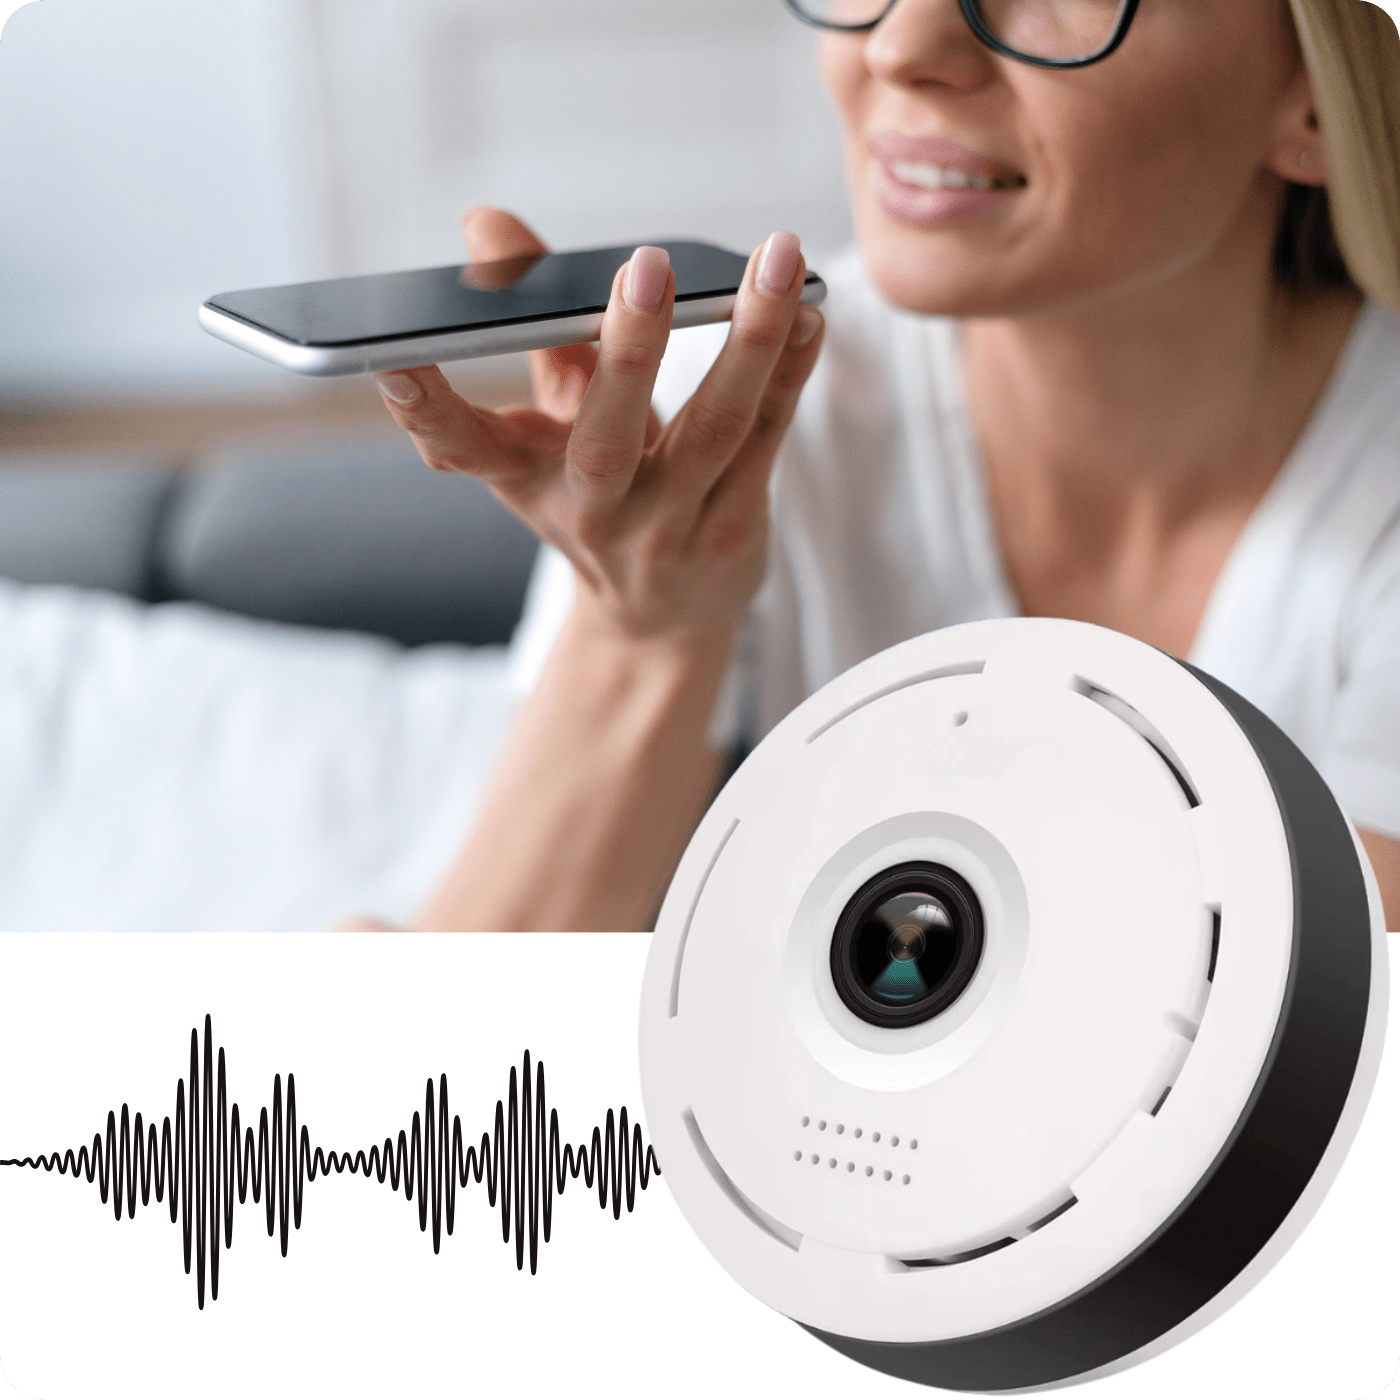
Two-way voice communication
The device is equipped with a two-way voice intercom function, which enables real-time communication with the camera's surroundings. Thanks to the built-in microphone and speaker, you can not only hear what is happening in the monitored area but also transmit your messages.
This is an ideal solution when you want to contact household members, employees, or deter unwanted guests. No matter where you are, you have full control and the ability to interact – all you need to do is use the app on your smartphone.
External micro SD card slot up to 64GB
The camera has an external memory card slot, allowing you to quickly and easily retrieve recordings from the camera without having to dismantle the entire casing or disassemble the equipment.

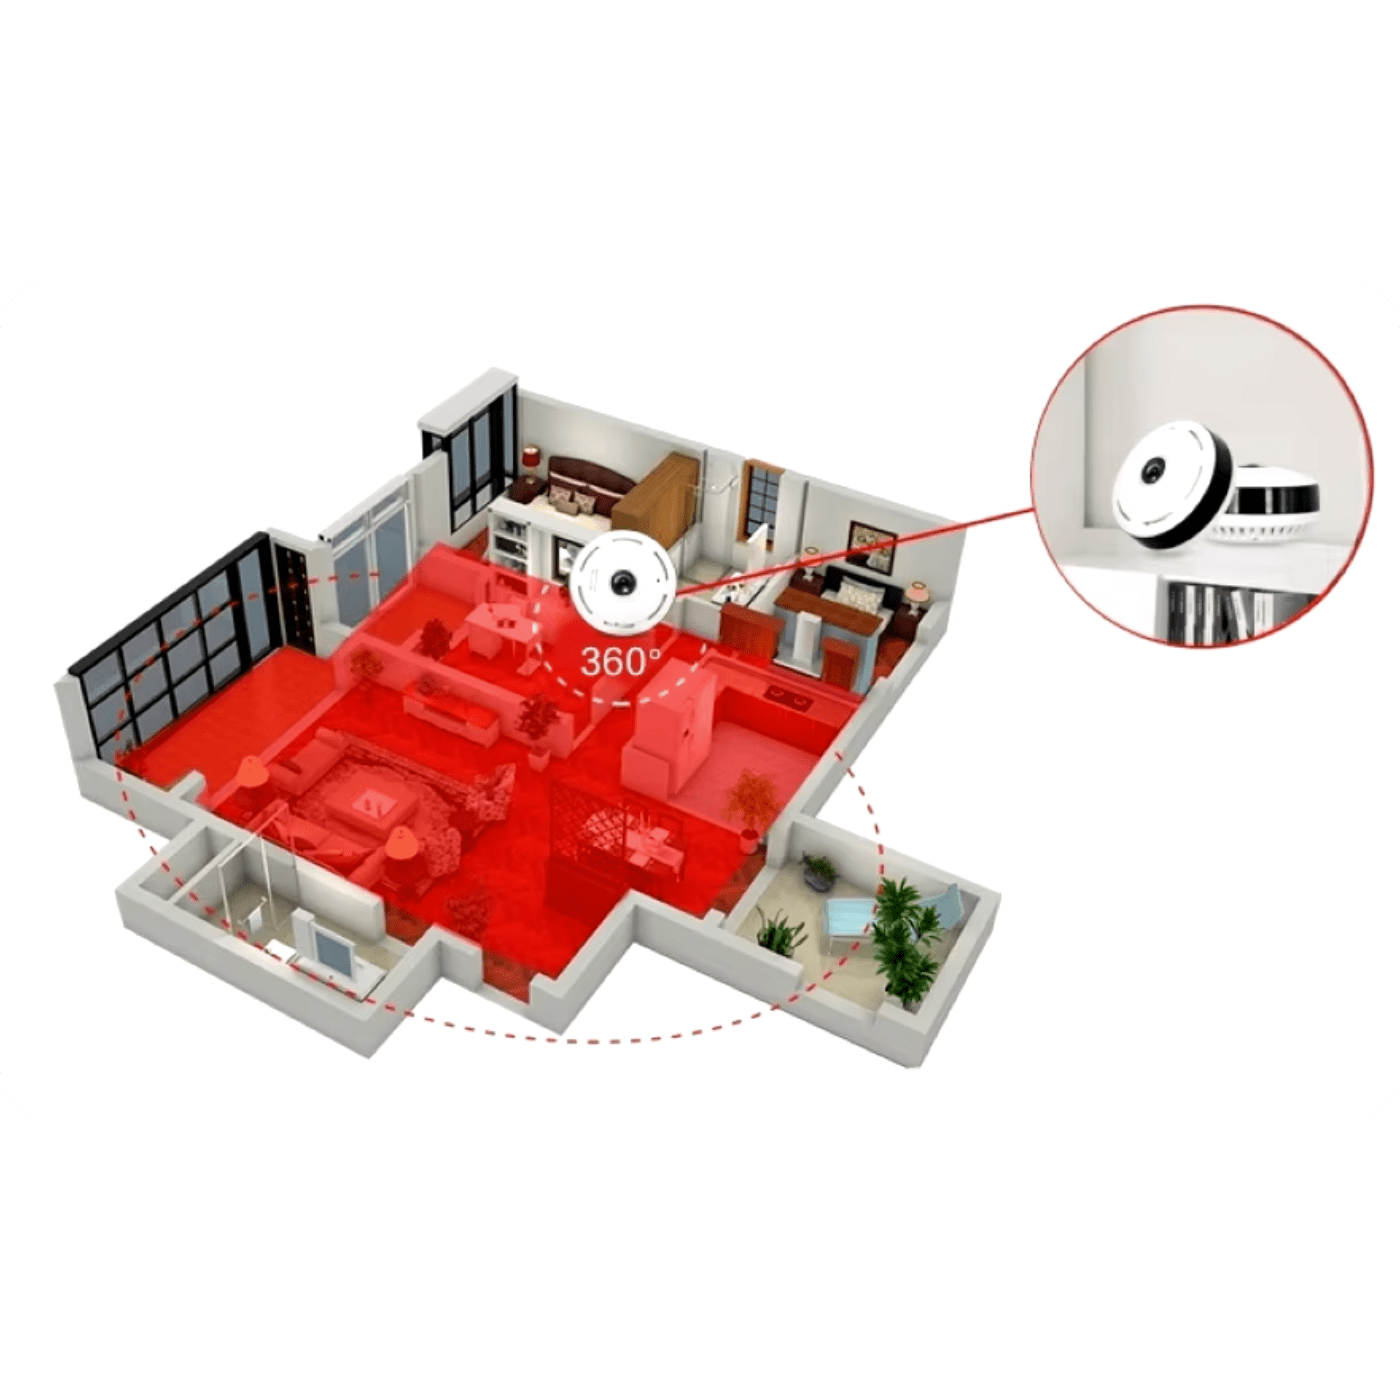
Full Panorama
The camera provides a full panoramic view thanks to an advanced "fisheye" lens with a 360-degree viewing angle. This means that one device can monitor an entire room without blind spots. No matter where you place the camera, you can be sure that it will capture every detail around it – both in front and to the sides.
Ideal for home monitoring, offices, or other spaces where full security and control are paramount.
Night mode
The device features IR CUT technology, allowing image tracking at night, which enables 24-hour image recording. The mode activates automatically in darkness - there is no need to turn it on manually.

Motion Detection
The camera is equipped with a motion detection system. If it detects motion, it sends a notification to the device where the application is installed. It is possible to set recording upon motion detection, which saves space on the memory card and provides recordings containing unusual behaviors.
Loop Recording
You can set the device to overwrite the oldest recordings with newer ones. The device is powered via a built-in USB port and the included cable (you can use mains power or a computer).

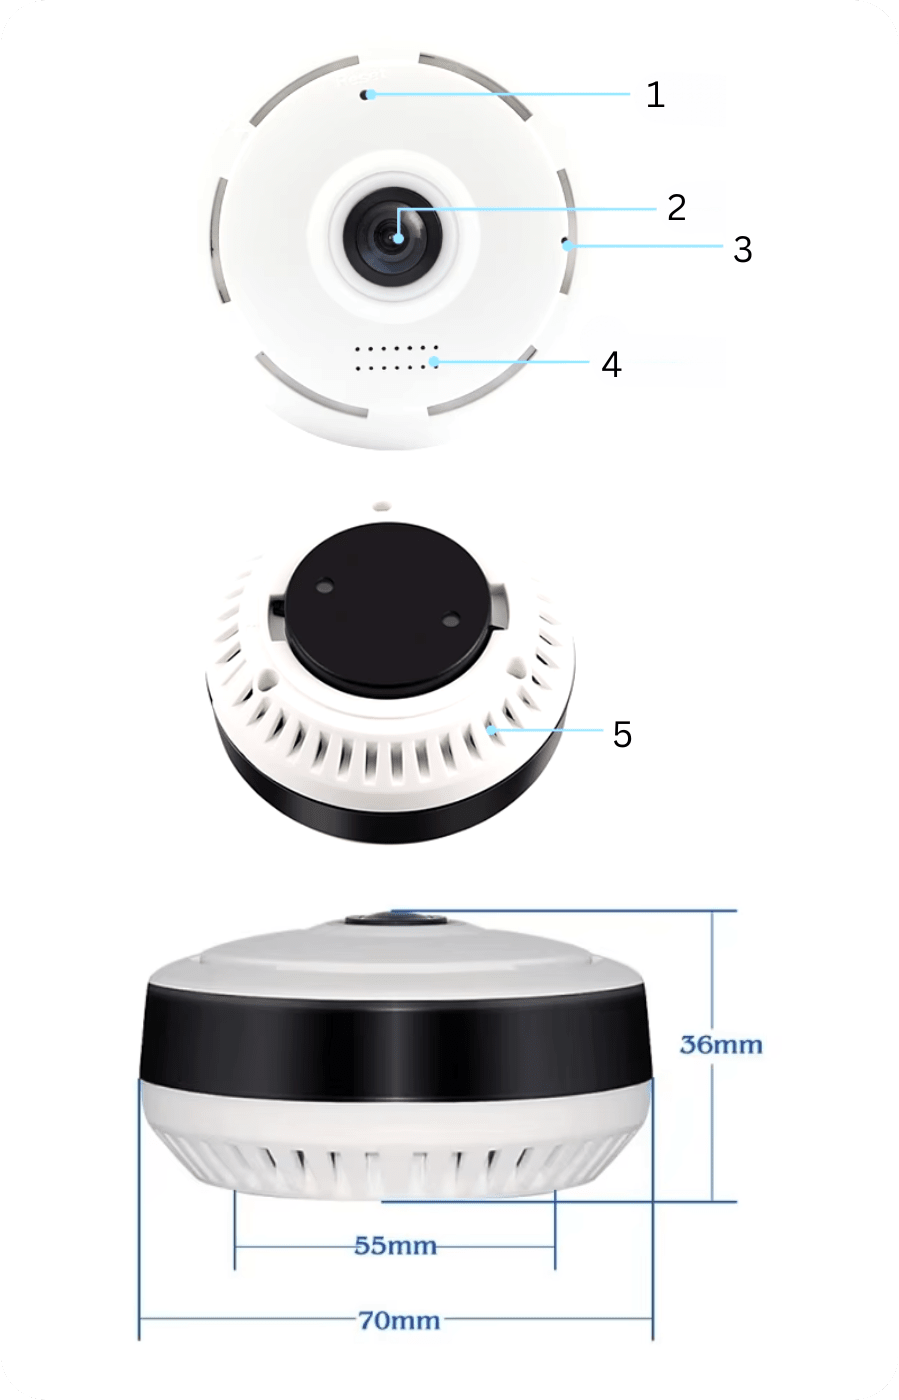
Camera Components
1. Reset button: Allows you to restore the camera's factory settings.
2. HD Lens: High-quality camera lens providing a clear image and high resolution.
3. Microphones: Built-in microphones enabling audio recording and two-way communication.
4. Speaker: Allows audio playback and use of the intercom function to communicate with the camera's surroundings.
5. Ventilation grille: Ensures proper camera ventilation, helping to maintain optimal operating temperature for the device.
Technical Specification
- Image sensor: HD720P/960P/1080P.
- Viewing angle: 360° (full panorama).
- Minimum illumination: 0.01 Lux @ F2.0; for black and white mode: 0.001 Lux @ F2.0.
- Wireless: IEEE802.11b/g/n standard.
- Network settings: Access Point mode (AP mode) and Station mode.
- Mobile Wi-Fi video: Supports streaming in HD720P/960P/1080P and VGA quality.
- Audio encoding: ADPCM, supports two-way voice intercom.
- Storage medium: Micro SD card up to 64 GB (card not included)
- USB cable length: Approximately 3m
- Dimensions: 70mm x 70mm x 36mm x 55mm
- Power supply: DC-5V, Constant power supply
- Weight: 70g

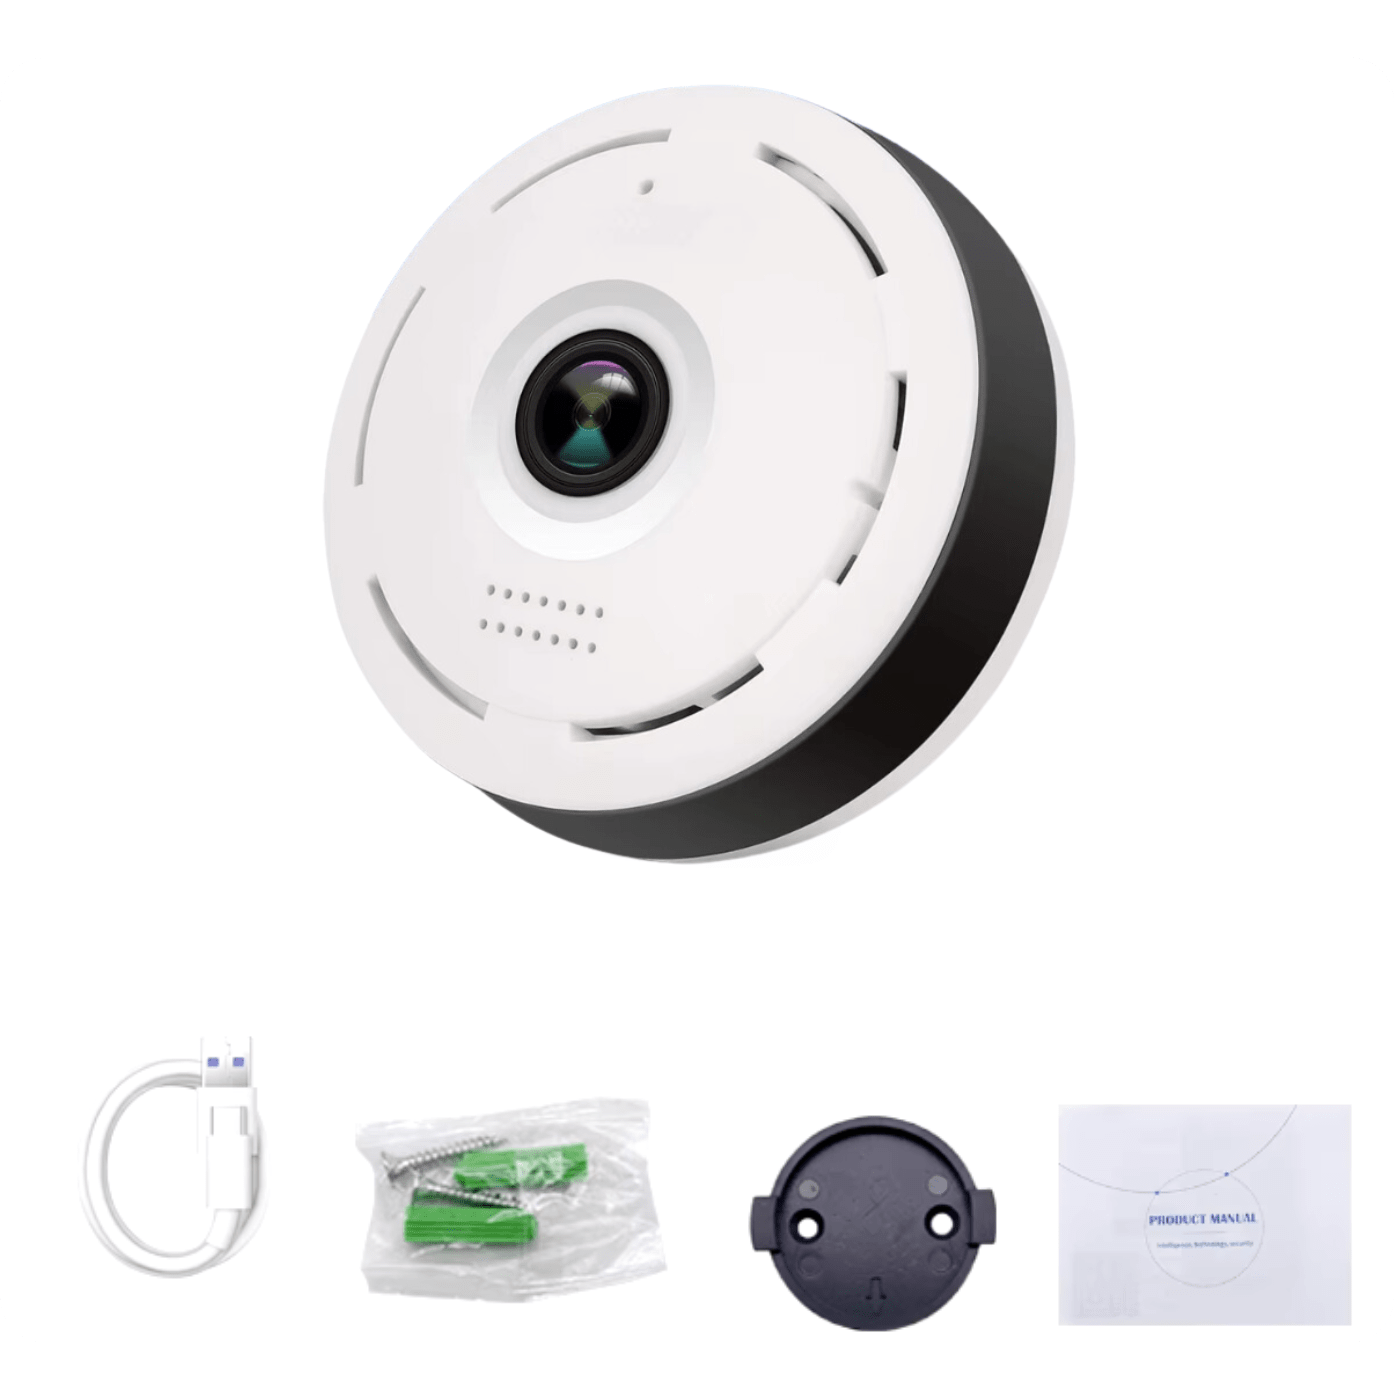
Set includes
- 1x Mini WiFi Camera A8S
- 1x USB cable
- 1x Power adapter
- 1x Mounting kit
- 1x Reset key
- 1x User manual